How to Install Wykamol High Load XPS Boards
Step-by-Step Guide – For Illustration Purposes Only
⚠️ Important Disclaimer:
This guide is provided for illustration purposes only. It is not an official installation manual and does not replace the manufacturer’s technical data sheets, method statements, or professional advice. Always follow current manufacturer documentation and applicable building regulations. Clever Shield Coatings Ltd accepts no liability for any loss, damage, or misuse arising from this information.
This guide is provided for illustration purposes only. It is not an official installation manual and does not replace the manufacturer’s technical data sheets, method statements, or professional advice. Always follow current manufacturer documentation and applicable building regulations. Clever Shield Coatings Ltd accepts no liability for any loss, damage, or misuse arising from this information.
1. Introduction
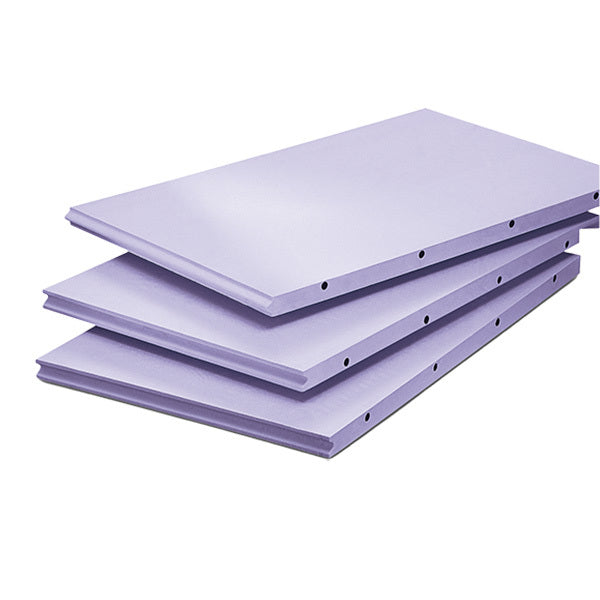
Wykamol High Load XPS Boards are extruded polystyrene insulation boards designed to provide robust thermal insulation and compressive strength in floors and selected wall build-ups. They are commonly used beneath screeds or board overlays, in high-traffic or load-bearing areas where moisture resistance and durability are required.
This guide outlines a typical approach to handling, setting out, and installing high load XPS boards for illustrative purposes only. Actual methods vary with substrate type, site conditions, board thickness, loading requirements, and the chosen finishing system.
2. System Overview
- Board type: Extruded polystyrene (XPS) with high compressive strength.
- Typical uses: Below screed, under floating floors, perimeter upstands, and insulated build-ups where point loads are anticipated.
- Key benefits: High compressive strength, low water absorption, lightweight, easy to cut, rapid installation.
- Limitations: Not a substitute for a structural slab. Protect from solvent-based products and naked flames. Verify compatibility of adhesives and primers.
3. Preparation
- Survey: Confirm design requirements (U-values, loadings, thicknesses, edge details, damp proofing).
- Substrate condition: The base should be sound, clean, and reasonably level. Remove dust, debris, sharp projections, and contaminants.
- Moisture control: Where required, install or verify an appropriate damp proof membrane (DPM) or vapour control layer per the design.
- Level corrections: Fill local hollows and grind down high spots to achieve a suitable tolerance for board bearing.
- Environment: Install within recommended temperature ranges. Avoid standing water and driving rain during installation.
4. Tools & Materials
- High Load XPS boards (specified thickness)
- Tape measure, straightedge, marker
- Hand saw or hot-wire cutter / sharp knife for trimming
- Compatible adhesive (where bonding is specified) and/or low-expansion PU foam (if permitted by design)
- Sealing tape for board-to-board joints (where specified)
- Temporary weights or sandbags for consolidation (if needed)
- PPE: gloves, eye protection, suitable mask if cutting generates dust
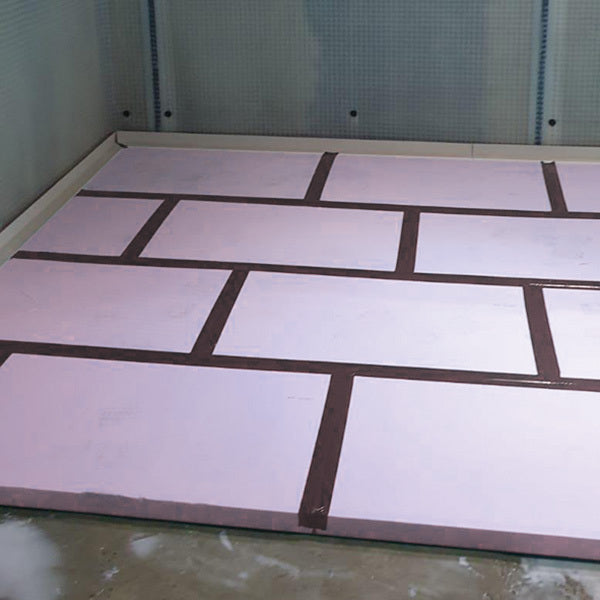
5. Layout & Setting Out
- Plan the board layout to stagger joints (brick bond) and minimise narrow offcuts at edges and penetrations.
- Allow for perimeter upstands where the design requires thermal continuity at walls and thresholds.
- Pre-cut boards to suit columns, service penetrations, and doorways, keeping cuts neat and square.
6. Cutting & Handling
- Cut XPS boards with a fine-tooth saw, hot-wire cutter, or a sharp knife with multiple light passes against a straightedge.
- Handle carefully to avoid damaging edges and corners. Keep boards clean and dry before installation.
- Avoid contact with solvents, fuel, and aggressive chemicals. Protect from prolonged UV exposure before covering.
7. Board Installation – Floors
- Loose laid or bonded: Install as per design—either loose laid on a suitable layer (e.g., DPM/levelling layer) or bonded using a compatible adhesive. Follow adhesive open times and coverage rates.
- Placement: Lay the first row along a straight datum. Stagger subsequent rows so that end joints are offset (brick bond pattern).
- Joints: Butt boards tightly without forcing. Where specified, tape joints to limit grout/levelling compound ingress.
- Consolidation: Use light, even pressure or temporary weighting to ensure full contact with the base where bonding is used. Do not over-compress.
- Perimeter: Install upstand insulation at walls where required, maintaining separation from screed or boards to reduce thermal bridging.
8. Board Installation – Walls (Where Applicable)
- Only install to walls where the design specifies XPS boards as part of a composite build-up (e.g., within a lining system or protective layer before finishes).
- Use compatible mechanical fixings and/or adhesive methods specified by the design. Verify pull-out strength and fixing density.
- Protect XPS with approved linings or boards where impact resistance or fire performance is required by the design.
9. Edge, Threshold & Penetration Details
- Maintain continuous insulation at edges and thresholds where practicable. Use neatly cut upstands and infills.
- Seal around service penetrations with compatible materials to reduce air leakage and thermal bypass.
- Form movement joints in the screed or overlay per the screed/finish specification; do not bridge structural joints.
10. Finishing Options
- Under screed: Place a separating layer if specified, then install the screed to the required depth and specification. Protect during curing and prevent point loading.
- Floating floor build-ups: Install appropriate overlay boards (e.g., chipboard/OSB) over the XPS, following manufacturer guidance for thickness and jointing. Leave expansion gaps where required.
- Services: Where services run within or across the build-up, ensure adequate load spread and compliance with building regulations.
11. Quality Checks & Common Pitfalls
- Check for rocking boards—address uneven substrates before proceeding with finishes.
- Avoid gaps at joints; re-trim pieces for a snug fit. Do not force boards into place.
- Protect installed boards from damage and contamination before screeding or overlaying.
12. Product Availability
All components required for this installation—Wykamol High Load XPS Boards, compatible adhesives, tapes, upstand strips, and finishing accessories—are available directly from Clever Shield Coatings. Use the search bar on our website or browse our product categories to find the items you need.
13. Aftercare & Inspection
- Once finishes are complete, avoid point loading until screeds or overlays have fully cured.
- Do not expose XPS to incompatible chemicals or excessive heat sources.
- If subsequent works penetrate the build-up, consult the project design to avoid compromising performance.
⚠️ Legal Notice:
This information is based on general industry practice for high-compressive XPS insulation systems and is provided for illustration only. It is not official manufacturer guidance. Specifications, components, and methods may change without notice. Clever Shield Coatings Ltd provides this content “as-is” and assumes no responsibility for its use or interpretation. Always consult the manufacturer’s current technical documents, relevant standards, and qualified professionals before installation.
This information is based on general industry practice for high-compressive XPS insulation systems and is provided for illustration only. It is not official manufacturer guidance. Specifications, components, and methods may change without notice. Clever Shield Coatings Ltd provides this content “as-is” and assumes no responsibility for its use or interpretation. Always consult the manufacturer’s current technical documents, relevant standards, and qualified professionals before installation.