Floor Drainage Channel Solutions
Perimeter Floor Channel Drainage Solutions
Quick Links
Drainage Channel

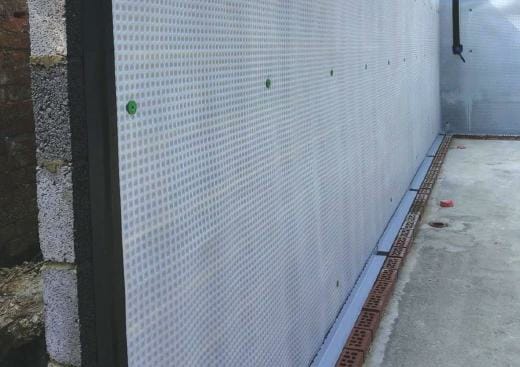
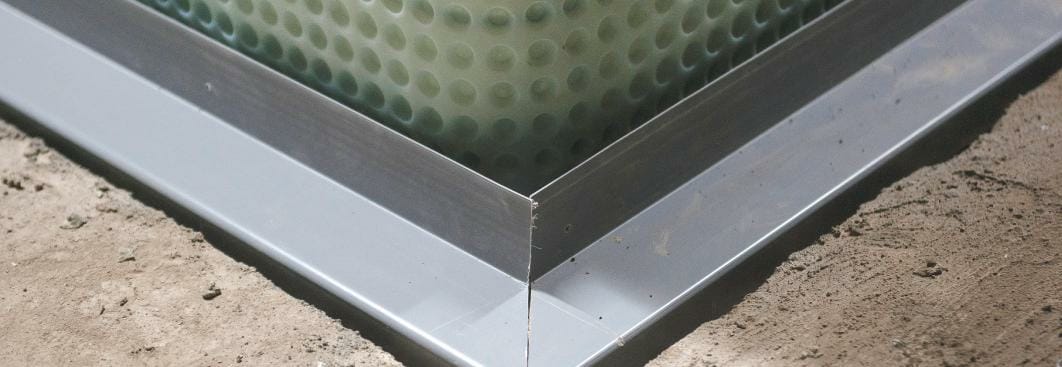
Wykamol perimeter channel which is a P.V.C drainage conduit specifically designed for the control of water ingress in below ground situations. It is installed at the vulnerable wall/floor junction to the soil retaining walls or, around the perimeter of the floor slab to be used in most waterproofing situations, and is particularly suited for use in conjunction with Wykamol Cavity Drain Membrane systems.
Water entering the building through the walls is controlled behind the Wykamol Membrane and diverted to the perimeter channel at the base of the wall. The water enters the perimeter channel through pre-drilled drainage holes and must then be diverted to a suitable drainage point, either natural or mechanical, the perimeter drainage is set dead level and not to falls.
Waterguard
|
FloorDrain
|
There are a number of ways to design drainage conduit into your Type C cavity drain system, the most used are listed below. We would advise that all new concrete slabs should be designed by a structural engineer to the required thickness’s and required specification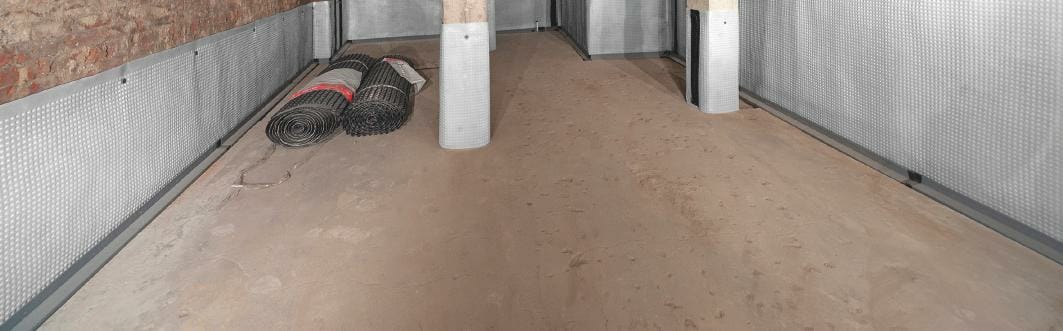
Drainage Design
|
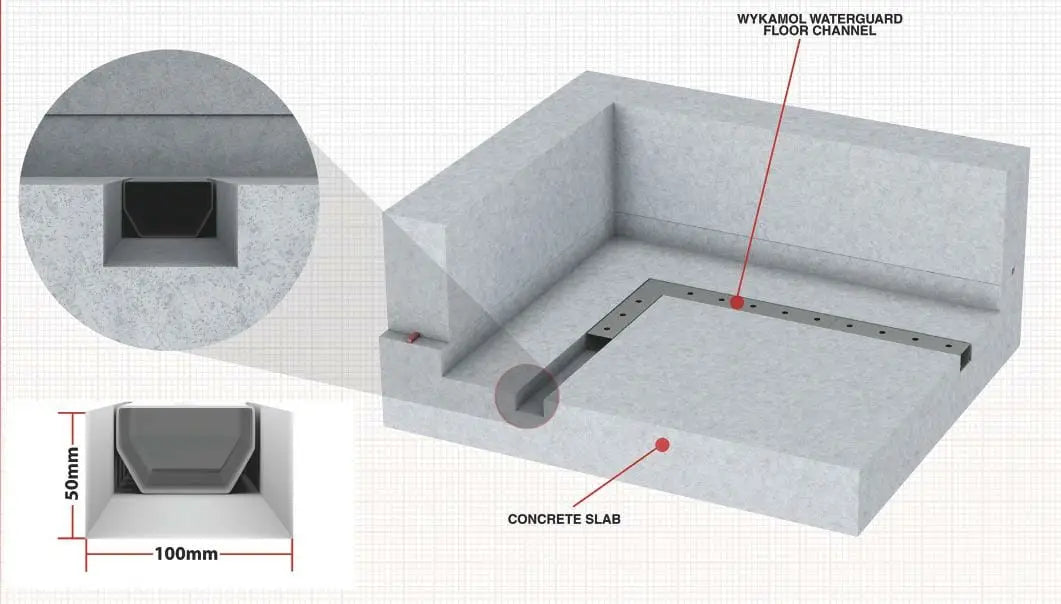
1. Pre formed channel set in a new concrete
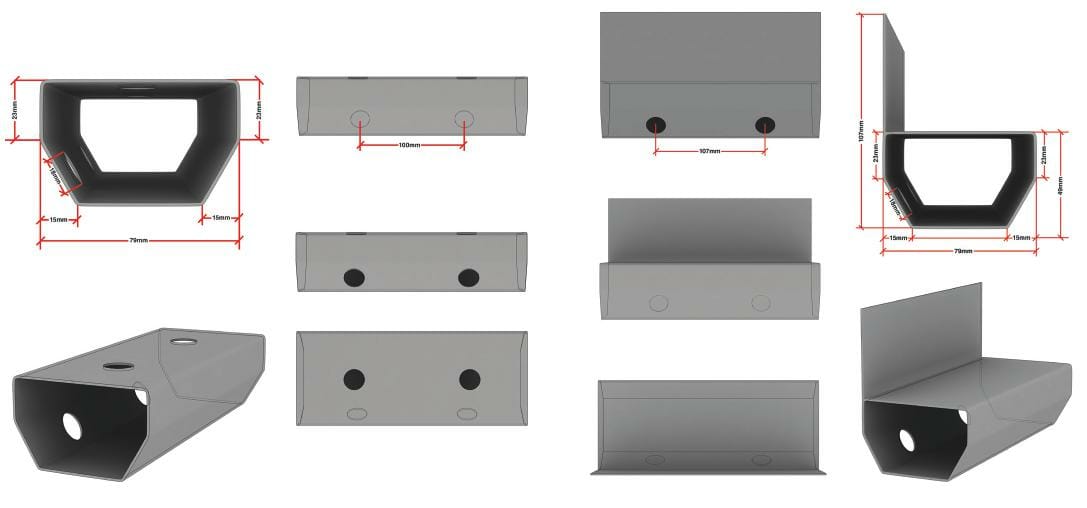
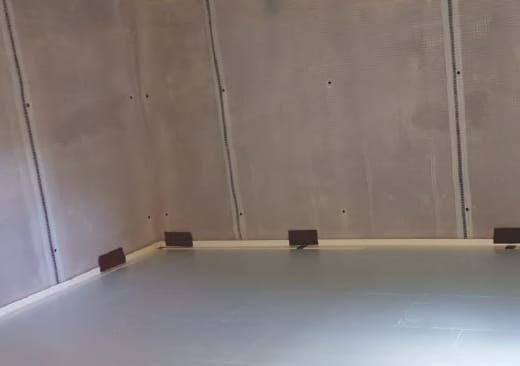
The pre formed channel would normally be formed at the wall/floor junction to the soil retaining walls 100mm wide x 50mm deep, using a length of timber as the shutter. Other materials can be used, but the key is to set the shutter level. One way of achieving this is to use 90-degree angle brackets, fixed to the timber and wall substrate. The new concrete can be poured under the timber shutter and level with the top of the timber shutter. When the concrete is dry, remover the brackets
and timber, you now have a level pre formed channel at the correct width and height. Please take in to account that further shuttering may be required for the pipe works to the sump station or natural drainage points.
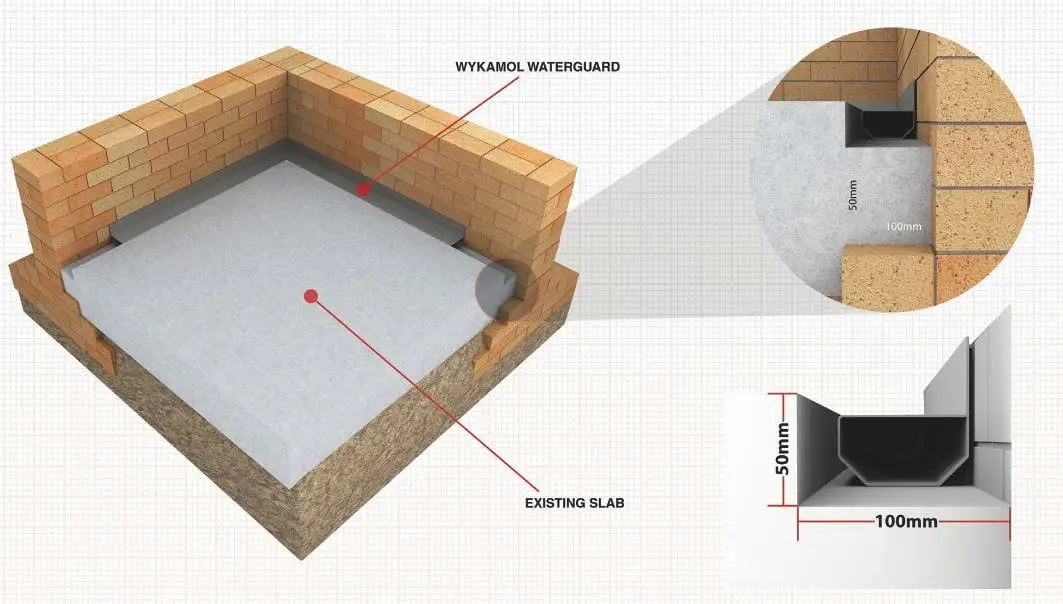
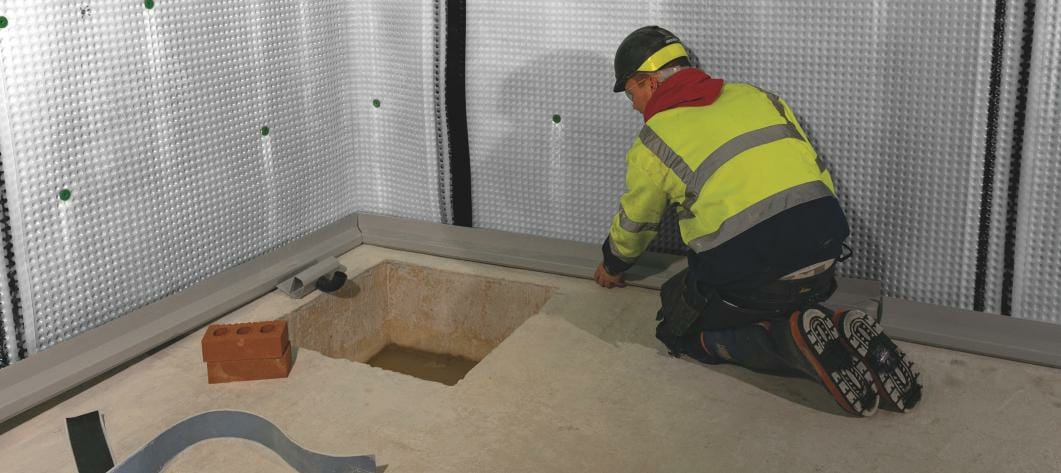
2a. Forming a channel in to existing concrete slabs
A survey should be carried out by a structural engineer, to the existing concrete slab, once the engineer has passed the slab with the knowledge that the specialist contractor will be cutting in to the slab at the wall/floor junction to form a drainage channel, the works below can proceed. To form the channel cut out approx. 100mm wide x 75mm deep (cutting out exactly 50mm may not be possible) at the wall/floor junction. Install the Wykamol Waterguard channel level, you may need to set the Waterguard channel on clean washed shingle or stone to achieve a level setting, do not use gravel. Care must be taken you do not cut through the slab completely, if the slab is cut completely through, please use the method below.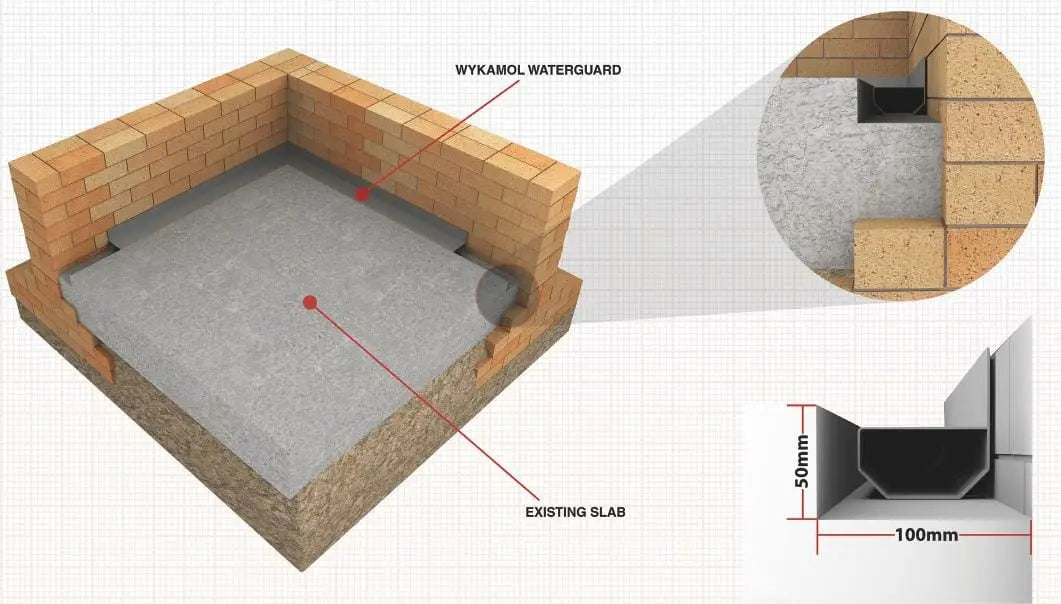

2b. Cutting through whole slab
If the existing concrete slab has been cut completely through, dig further down in to the oversite and under the slab and infill with concrete, this will help form primary resistance to slow any water ingress that the existing slab was achieving before cutting through.
NOTE: On some occasions by cutting through the slab, water ingress may be to severe to slow the water ingress using the method on the next page (Fig 4) on these occasions a wider
new section of slab may need to be installed and tied in to the existing slab, or a new concrete slab may be required. A structural engineer should be consulted.

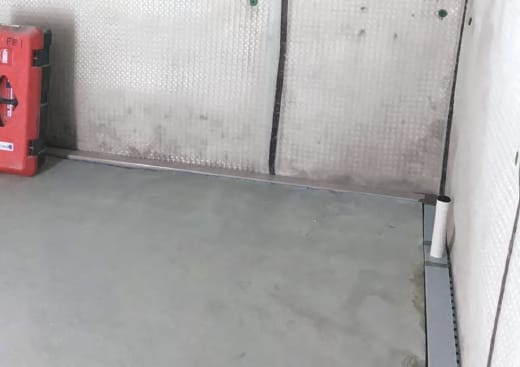
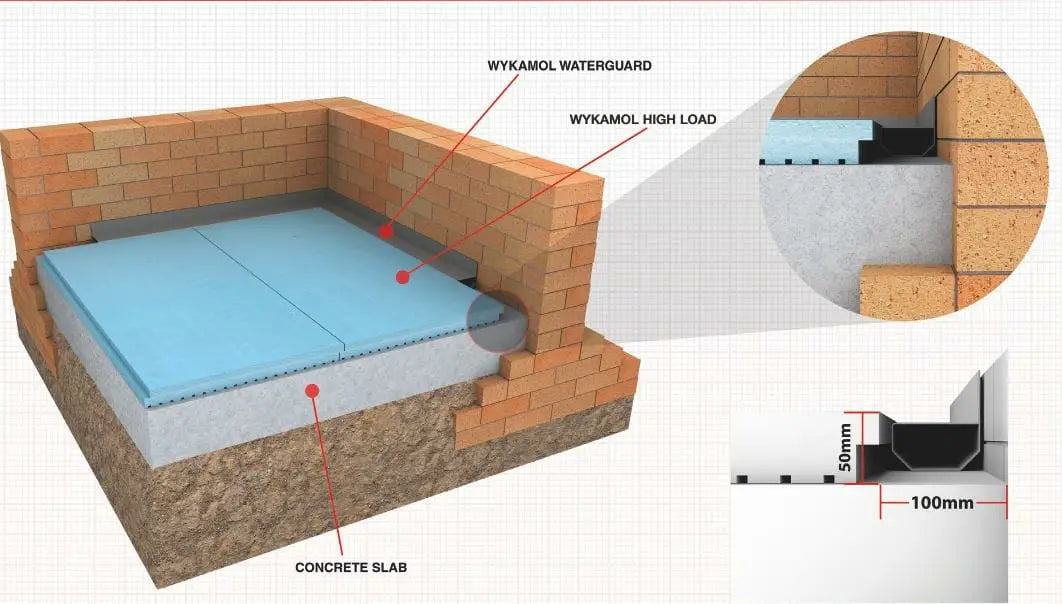
3. Forming a channel on to the concrete slab using specialist Danopren closed cell insulation
Install the Wykamol Waterguard channel level at the wall/floor junction to the soil retaining walls, install the 50mm Wykamol Highload thermal spacer over the slab abutting the Waterguard channel. If required the Highload spacer can be fixed to the
slab using Wykamol 110mm Cob fixings, tape/seal all the joints. Install 65mm screed over.
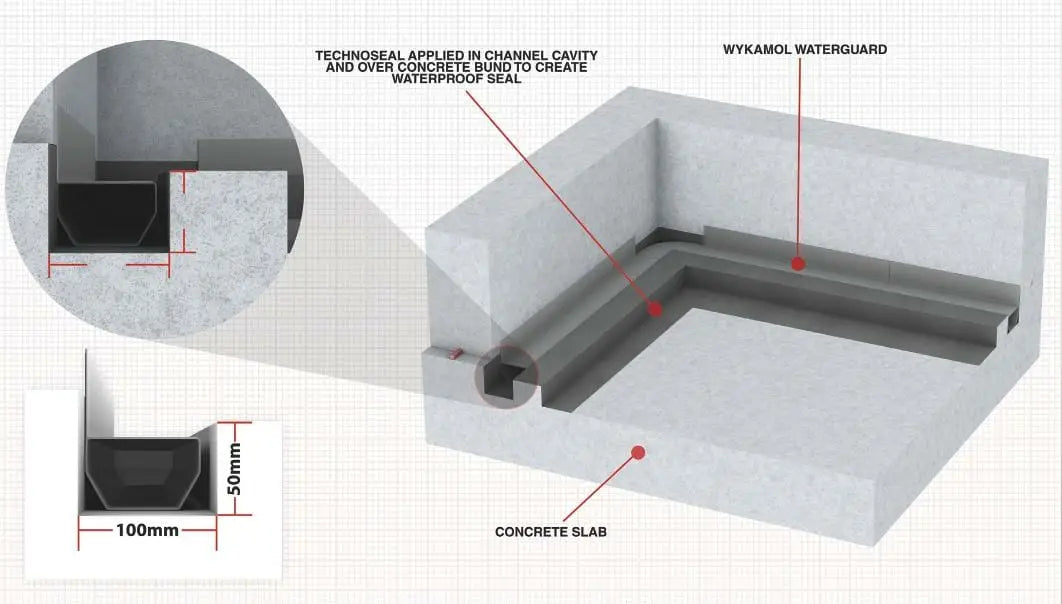
4. Forming a channel on to the concrete slab using a waterproof bund
The upstand/bund can be formed either casting a concrete upstand to the height required or using an engineering brick, bedded and flush pointed in waterproof mortar (use wykamol Renderproof waterproof additive in the mortar mix) The upstand
/bund is then 2 x coated in Wykamol Technoseal waterproof liquid membrane to create a waterproof bund/channel. The waterproof bund should be tested and commissioned prior to installing the full cavity drain system for any defects or
seapage. Install the Wykamol Waterguard channel, setting level.

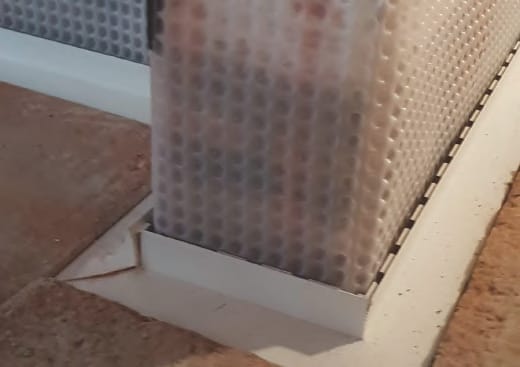
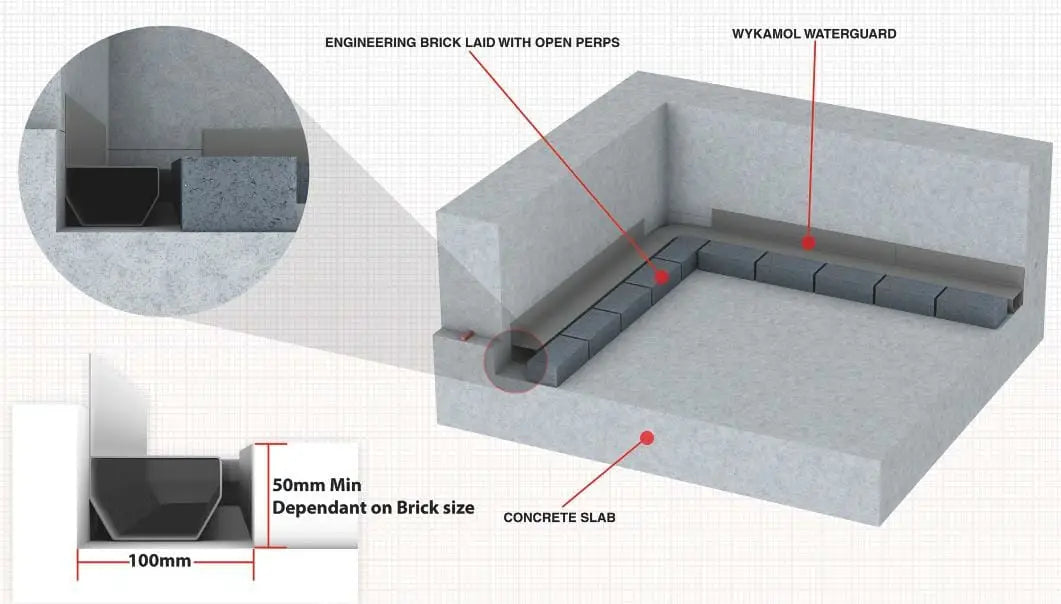
5. Forming a channel on to the concrete slab using an engineering brick with open perpendicular joints
Install an engineering brick on to the slab leaving a number of the perp joints open (approx. 500mm depending brick or block being used) to allow any water ingress to move over the concrete slab to the drainage channel. Install the Wykamol Waterguard channel, set level.
NOTE: All the above drainage conduits should have the required flushing points and be fully tested and commissioned, the sump stations or natural drainage should also be fully tested and commissioned. Your client should be put on notice that servicing will be required, either by the specialist contractor or by the client’s own contractor under a service agreement.
6. Pre formed channel in to the new concrete, but off set from the wall/floor junction
The pre formed channel would normally be formed away from the wall/floor junction near or close to the soil retaining walls 100mm wide x 50mm deep, using a length of timber as the shutter. Other materials can be used, but the key is to set the shutter level. The new concrete can be poured under the timber shutter and level with the top of the timber shutter, or installed as the concrete is still wet, again setting level is key. When the concrete is dry, remove the timber. You now have a level pre formed channel at the correct width and height. Please take in to account that further shuttering may be required for the pipe works to the sump station or natural drainage points.
7. Forming a channel on to the concrete slab using a sacrificial screed
Form a 100mm wide x 50mm deep timber shutter level at the wall/floor junction to the soil retaining walls, pour a 50mm sacrificial screed over the slab, when the screed is dry, remove the timber shutter, this forms the drainage channel.
Install the Wykamol Waterguard channel level in to the formed channel.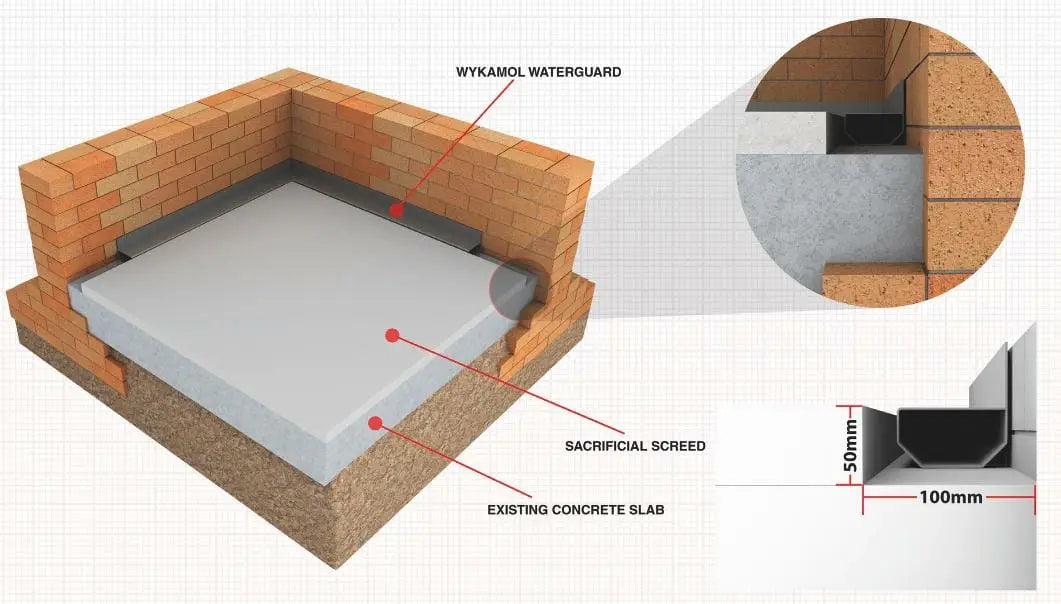
Perimeter Channel Accessories
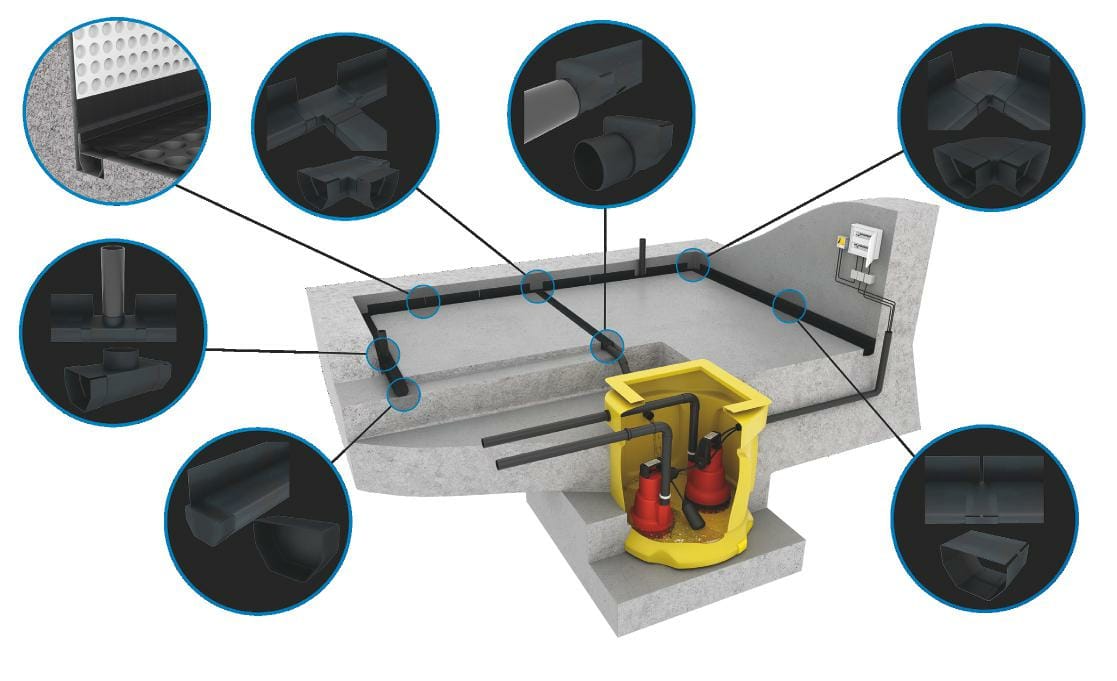
As part of our perimeter channel system, Wykamol are able to supply various options for connecting the channels, and specialist jointing sections for corners as well as drainage outlets to remove water to natural or pumped drainage.
Please see the diagram below which shows these items insitu as well as the following descriptions of products that are available as part of the drainage system. Care must be taken to ensure cleaning and maintenance of these systems also and jetting facilities need to be incorporated within the scheme.
Wykamol also offer a comprehensive pump drainage catalogue to work with the channel systems, this is available from the Wykamol team.
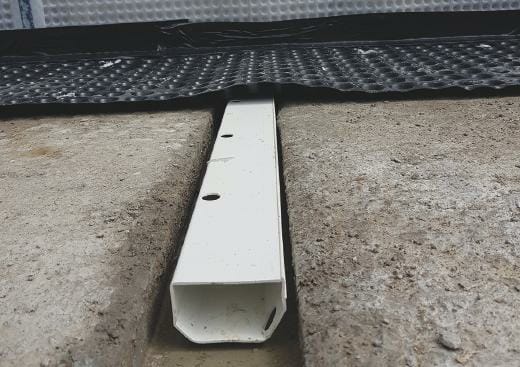
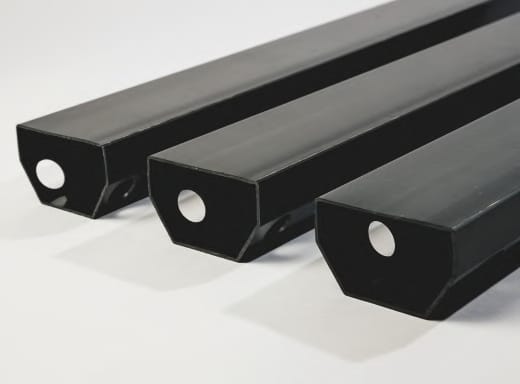
Waterguard
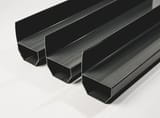
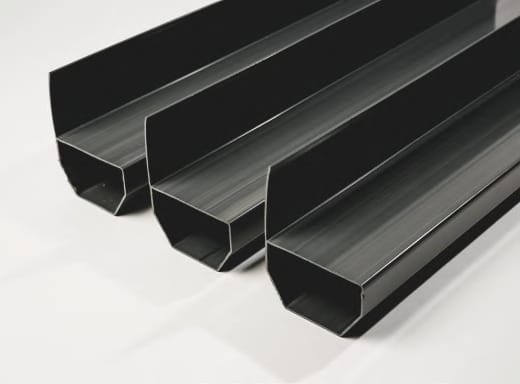
Wykamol Waterguard is a PVC drainage conduit designed for the control of water ingress in below ground situations. Wykamol Waterguard is fitted around the perimeter of the floor at the vulnerable wall/floor junction.
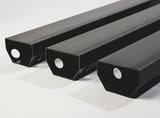
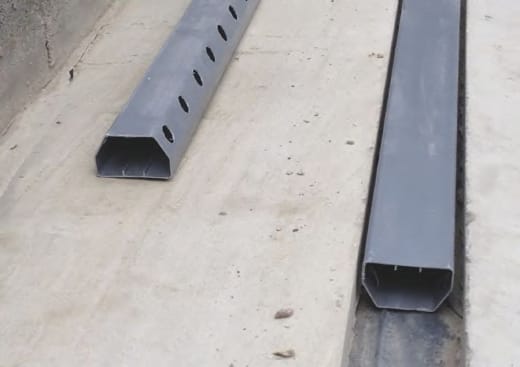
Floor Drain
Wykamol floor drain is a PVC conduit designed for the control of water ingress in below ground situations. Wykamol floor drain can be fitted around the perimeter and also as cross floor drainage as part of a managed water removal system.
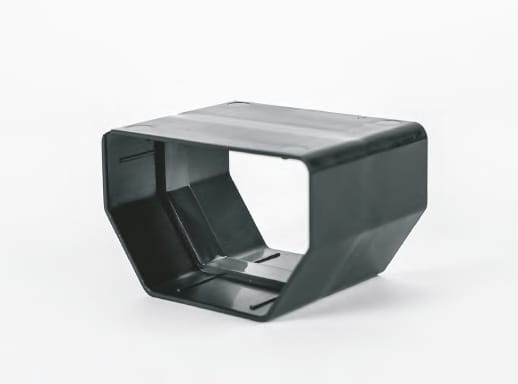
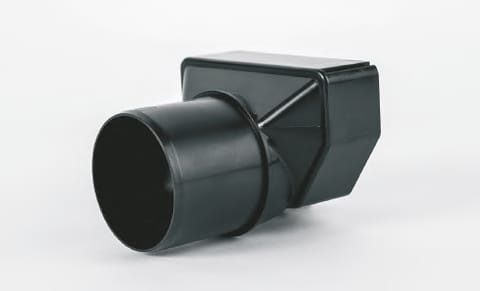
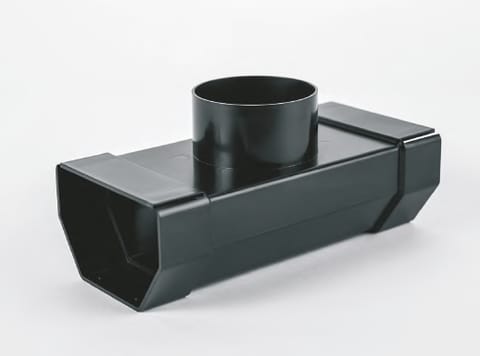
Universal Channel
Newly designed channel outlet to remove water from the channel to the sump. This has the benefit of a 100mm outlet for high water movement or for easier installation into the sump chamber.
It also comes with a jetting eye which can be cut down to suit floor finishes. Can be used with floor drain and waterguard channels.
50mm Outlet
Wykamol 50mm outlet is a multi purpose outlet to take water from the waterguard or floor drain systems into a sump chamber or through a wall on a sloping site to a gully. New snap in solution is easy to install with all channel systems .
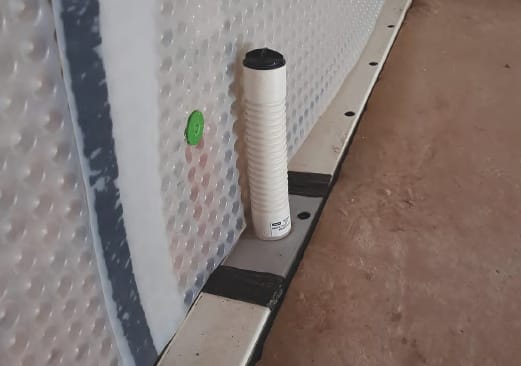
Flexi Jetting Eye
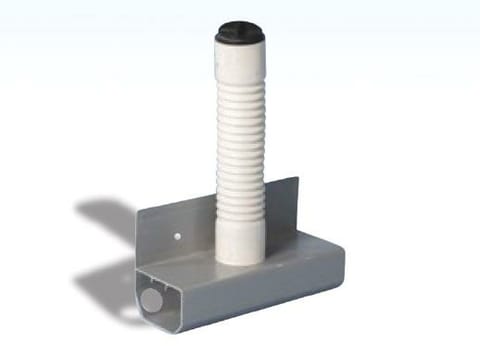
Extended Jetting Eye
Having a unique 50mm connector allows for pipework to be added to the jetting eye to access the channel system for cleaning and inspecting. It is recommended 1 jetting eye is installed every 10 to 12 metres of channels.
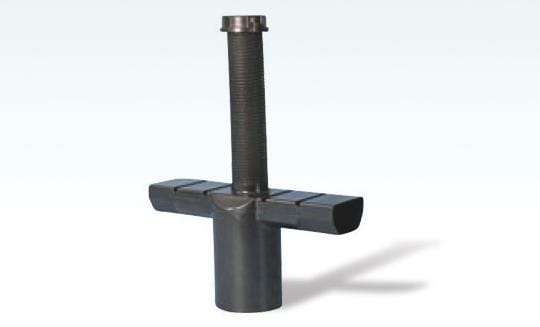
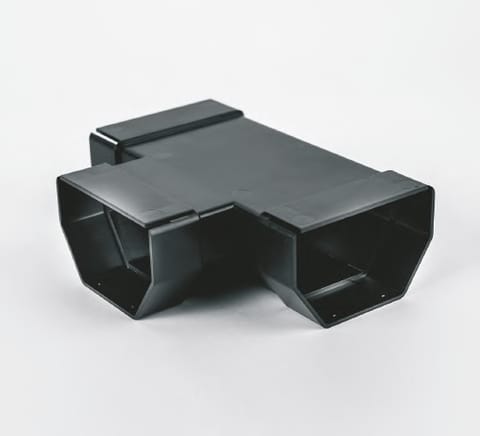
T-Piece
This can be used in cross floor drainage or as a connector to take water into a sump chamber via a floor drain section.
Easy unique push fit interlock application to enable a speedy installation.
No lips in the t-piece to inhibit lime build up.
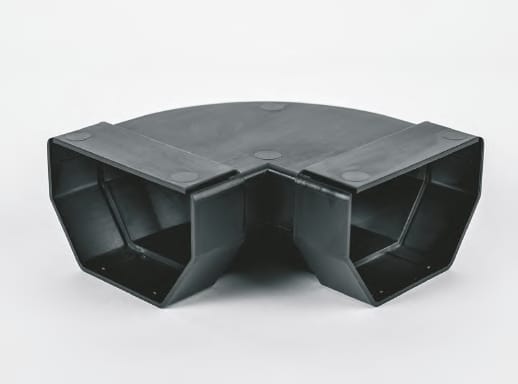
Swept Corner
No sharp edges also allows for a seamless flow of water and also helps inhibit lime build up within the system itself.
Jointing Section